

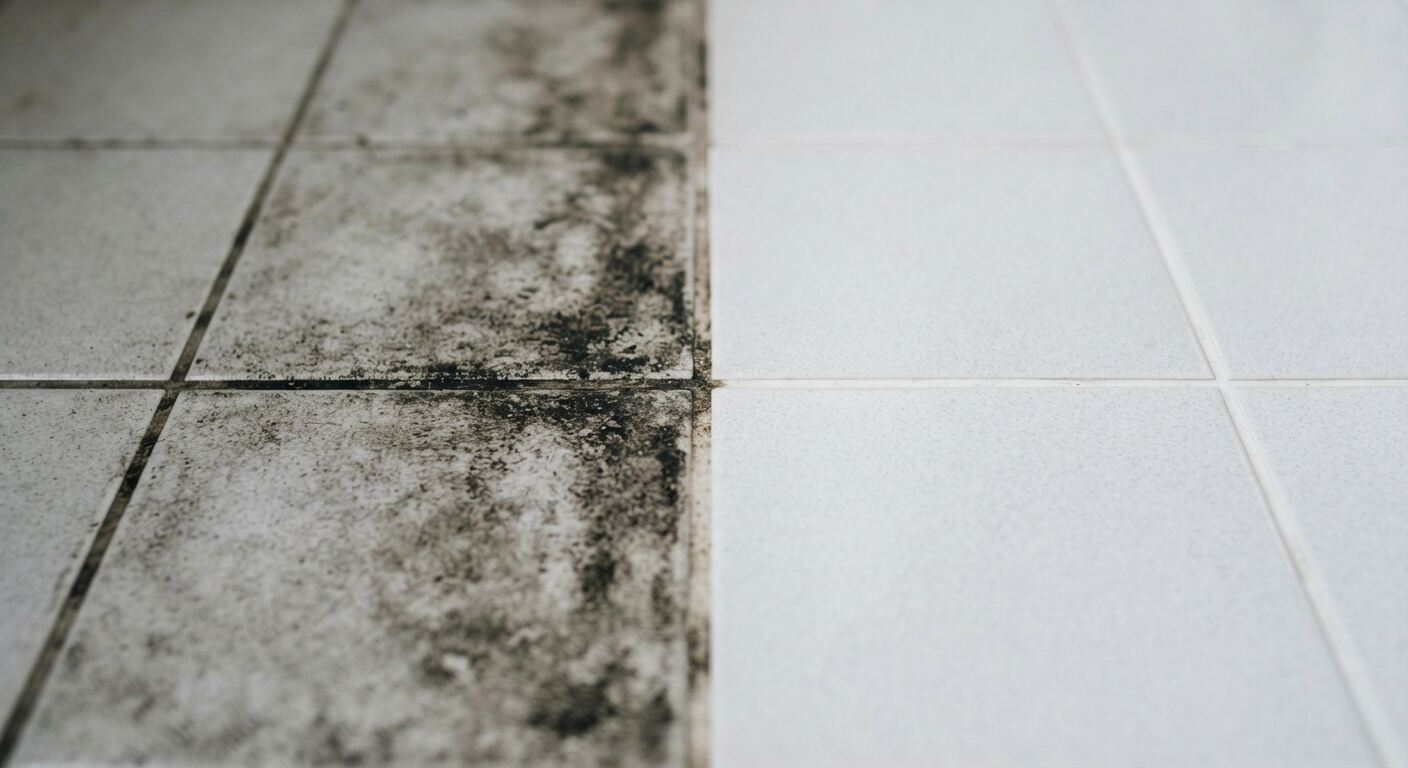
Grout usually looks dirty long before the tile does. Most grout is cement based and porous, so it soaks up dirt, grease, soap residue, and moisture.
You can handle most everyday grout dirt at home, but the cleaner matters. A product that’s fine on ceramic or porcelain tile can discolor grout or damage nearby natural stone.
Here’s how to clean grout safely, what to use for tougher stains, and which mistakes to avoid.
Short answer: Start with warm water and mild dish soap, then try a baking soda paste. For tougher stains on cement grout, test baking soda with 3% hydrogen peroxide, and use oxygen bleach for heavy discoloration if the label allows. Scrub with a nylon brush, rinse well, and test a hidden spot first. Skip vinegar on natural stone, chlorine bleach on colored grout, and wire brushes. Never mix cleaners.
First, Know What Kind of Grout You Have
A few quick checks can help you choose a safer cleaning method.
- Does it still repel water? On cement grout that may have been sealed, put a few drops of water on the surface and wait a few minutes. If they bead up, the sealer is still working. If the grout darkens and absorbs the water, the protection has worn off.
- Cement or epoxy? Cement grout is porous and usually benefits from sealing. Epoxy grout is denser, resists moisture and stains, and usually doesn’t need sealing. Newer grout products can have their own care rules, so check the manufacturer’s instructions.
- White or colored? Chlorine bleach can fade or discolor colored grout, especially with repeated use.
- Natural stone nearby? Marble, travertine, and limestone can be etched by acids. Use only products labeled safe for stone, and follow the tile or sealer maker’s instructions.
If you’re not sure what grout you have, check the product name, installer paperwork, or the manufacturer’s care instructions before using strong cleaners or sealers. For routine cleaning, start with a mild pH-neutral cleaner and test a hidden spot first.
What You’ll Need
- Baking soda
- 3% hydrogen peroxide
- Oxygen bleach powder for heavier stains
- Mild dish soap and warm water
- A stiff nylon grout brush or an old toothbrush
- A spray bottle, a small bowl, and clean cloths
- Rubber gloves and good ventilation
A commercial grout cleaner is also a good option. Follow the product label and make sure it’s compatible with both your grout and the surrounding tile.
How to Clean Grout Step by Step
- Sweep and vacuum. Remove loose dirt, dust, and grit so you don’t scrub it deeper into the grout lines.
- Mist lightly. A small amount of warm water helps loosen surface dirt. Avoid soaking the grout.
- Choose your cleaner. Start with the gentlest option likely to work. Warm water with a little dish soap is often enough for light dirt. For heavier grime on compatible surfaces, try a paste of baking soda and water. For tougher stains on cement grout and compatible tile, test a paste of about two parts baking soda to one part 3% hydrogen peroxide.
- Test a hidden spot. Apply a small amount to an out of the way section. Let it sit briefly, rinse it, and check for fading, discoloration, or surface damage.
- Apply the cleaner. Spread the paste along the grout lines and let it sit for 10 to 15 minutes. Don’t let it dry out completely. If you’re using soapy water, skip the wait and start scrubbing.
- Scrub gently. Work along the grout lines with a stiff nylon brush or toothbrush using small back-and-forth strokes. You shouldn’t need heavy pressure.
- Rinse thoroughly. Wipe with a clean cloth dampened with plain warm water. Rinse the cloth often so cleaner and loosened dirt aren’t spread back across the surface.
- Dry the area. Wipe or towel dry, and let the grout dry completely.
What to Use for Tough Grout Problems
The gentler cleaners handle everyday dirt well. For tougher problems, match the cleaner to the stain and the surface.
| Problem | What Usually Works | What to Avoid |
|---|---|---|
| Everyday dirt and grime | Warm water and mild dish soap, a pH-neutral cleaner, or a baking soda and water paste | Wire brushes and harsh acids |
| Grease in a kitchen | Dish soap and warm water, followed by a compatible grout cleaner if needed | Letting grease build up over time |
| Soap scum and mineral film | A grout or tile cleaner made for soap scum and compatible with the surface | Acids on natural stone |
| Deep discoloration on white cement grout | Oxygen bleach used according to the label | Mixing bleach with other cleaners |
| Stains on colored grout | A pH-neutral grout cleaner or another product approved for colored grout, after a spot test | Repeated chlorine bleach use |
For heavy staining, mix oxygen bleach exactly as directed on the label, let it sit for the recommended time, then scrub and rinse thoroughly. Always wear gloves and keep the room ventilated.
How to Clean Mold and Mildew From Grout
Black or gray spots around a shower or tub are often mold or mildew. Cleaning the surface helps, but the spots usually come back if the grout stays damp, so ventilation and drying matter as much as the cleaner.
Run the exhaust fan or open a window, wear gloves, and clean with a product that’s safe for your grout and tile. On cement grout, a tested baking soda and hydrogen peroxide paste or an oxygen-based cleaner can help with surface staining. Scrub gently, rinse well, and dry the area thoroughly.
To keep it from coming back:
- Run the bathroom fan during and after showers
- Use a squeegee or towel to remove standing water
- Repair leaks or spots where water keeps collecting
- Let the shower area dry between uses
If mold covers a large area, follows water damage, keeps coming back from inside the joints, or is spreading beyond the surface, get a professional assessment instead of repeating DIY cleaning.
What Ruins Grout
Most grout problems come from the wrong product, too much force, or poor drying. Keep these away from your grout:
- Chlorine bleach on colored grout. Repeated use can fade or discolor colored grout and may weaken cement grout or the sealer. For routine cleaning, use a gentler product.
- Mixing cleaning chemicals. Never mix bleach with vinegar, ammonia, hydrogen peroxide, or other household cleaners, and don’t combine vinegar and hydrogen peroxide in the same container. Use one product at a time and follow its label.
- Vinegar or lemon juice on natural stone. Acids can etch marble, travertine, limestone, and other acid-sensitive stone.
- Routine vinegar on cement grout. Vinegar is acidic, and repeated use can gradually wear down cement grout and some sealers. Occasional use on compatible ceramic or porcelain is less of a concern, but a pH-neutral cleaner is the better routine choice.
- Wire brushes and steel wool. They can scratch surfaces, damage grout joints, and leave metal particles that rust. Use a nylon brush instead.
- Drill brushes and heavy pressure. Aggressive scrubbing can wear away grout or damage weak joints. Let the cleaner do part of the work.
- Leaving grout damp. Constant moisture, especially in showers, encourages mold and mildew.
- Skipping the rinse. Leftover cleaner leaves a film that attracts more dirt.
If you’re not sure what your grout can handle, test first and start with the gentlest cleaner that works.
Should You Seal Grout After Cleaning?
It depends on the grout. Cement grout is porous and usually benefits from a penetrating sealer, which helps reduce water, oil, and stain absorption and makes future cleaning easier. Epoxy grout and some newer products often don’t need sealing.
Before sealing, the grout needs to be clean and completely dry. That typically takes 24 to 72 hours after cleaning, depending on how wet it got, the ventilation, and the humidity. Then follow the sealer label for application, number of coats, and cure time.
How often should you reseal? Many sealers last about 1 to 3 years, and showers and busy kitchens wear them down faster. Instead of counting years, use the water drop test. If water soaks in quickly and darkens the grout instead of beading, it’s time to reseal.
How to Keep Grout Clean Longer
- Wipe down shower tile and grout after use
- Use a squeegee to remove standing water
- Run the bathroom fan during and after showers
- Mop floors regularly using clean water and a pH-neutral cleaner
- Change dirty mop water instead of spreading it around
- Wipe up kitchen grease and spills quickly
- Use doormats at entryways to reduce grit
- Reseal cement grout when the water drop test says it’s needed
Ames tap water is on the hard side, which can leave a mineral film on tile and grout over time, especially in showers. Regular wiping and rinsing helps reduce that buildup.
When to Call a Pro in Ames
Home cleaning works well for regular maintenance, but some problems are better handled professionally.
Consider calling a professional for:
- Deep discoloration that doesn’t improve after careful cleaning
- Cracked, crumbling, or missing grout
- Natural stone tile you’re unsure how to treat
- Large areas, such as an entire kitchen or several bathrooms
- Mold that keeps returning
- Stains that have soaked in deeply
- Grout that needs repair or resealing as well as cleaning
If you’re deciding whether to clean it yourself or hire help, our guide on DIY or professional tile and grout cleaning in Ames explains the difference.
Doug and Renae have run A-1 Carpet Cleaning in Ames, Iowa since 2004. When grout has gone beyond what routine home cleaning can handle, learn more about our tile and grout cleaning in Ames.
Call (515) 432-7500 for a quote.
Frequently Asked Questions
What is the best way to clean grout?
Start with the gentlest cleaner that works.
For light dirt, warm water with a little mild dish soap or a pH-neutral cleaner is often enough. For heavier grime on cement grout, try a baking soda paste. For tougher stains, test a baking soda and 3% hydrogen peroxide paste.
Scrub with a nylon brush, rinse thoroughly, and always test a hidden area first.
How do you get dirty grout white again?
Start with a gentle cleaner and a nylon brush.
For deeper staining on white cement grout, a tested baking soda and hydrogen peroxide paste or an oxygen-based cleaner can help. Follow the cleaner’s label and rinse thoroughly.
If deeply discolored grout doesn’t improve after careful cleaning, professional treatment may be the next step.
Does baking soda and vinegar clean grout?
The bubbling looks impressive, but it isn’t the best way to clean grout.
Vinegar is acidic and can damage natural stone, and repeated use can wear down cement grout and some sealers.
A baking soda paste, a pH-neutral cleaner, or another product approved for your grout and tile is a better place to start.
Is vinegar safe to use on grout?
Not as a routine cleaner.
Vinegar can etch marble, travertine, limestone, and other natural stone, and repeated use can wear down cement grout and some sealers.
If you want to use an acidic cleaner on ceramic or porcelain tile, first confirm that both the tile and grout can tolerate it.
Can you use bleach on grout?
Chlorine bleach is sometimes used on white cement grout, but it isn’t the best routine cleaner.
Repeated use can discolor colored grout and may weaken cement grout or the sealer. Start with a compatible grout cleaner or a gentler option.
Never mix bleach with vinegar, ammonia, hydrogen peroxide, or other cleaning chemicals.
How often should you clean grout?
Wipe shower tile and grout after use, mop floors weekly, and give grout a deeper scrub every few months or when it starts to look darker.
For sealed cement grout, do the water drop test now and then. When water soaks in instead of beading, reseal it, typically every 1 to 3 years depending on the product.
Do you have to seal grout after cleaning it?
For cement grout, it’s a good idea. It’s porous, and sealing helps it resist stains and moisture. Epoxy and some newer grout products often don’t need sealer.
Let the grout dry completely after cleaning, typically 24 to 72 hours, and follow the sealer label for application and cure time. If you’re not sure what type of grout you have, identify it before applying a sealer.